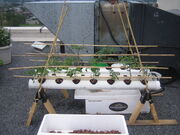
Build Your Own 38-site Aeroponic Propogator[]
It's relatively easy to jump-start your seedlings before putting them into your production system. A shallow plastic storage bin and a fogger are all that'srequired. This system works great with both seeds and cuttings.
Supplies Needed[]
- Plastic container 24" x 18" x 5" with non-transparent lid. Transparent lids are made from a plastic that cracks when you try to use a hole saw.
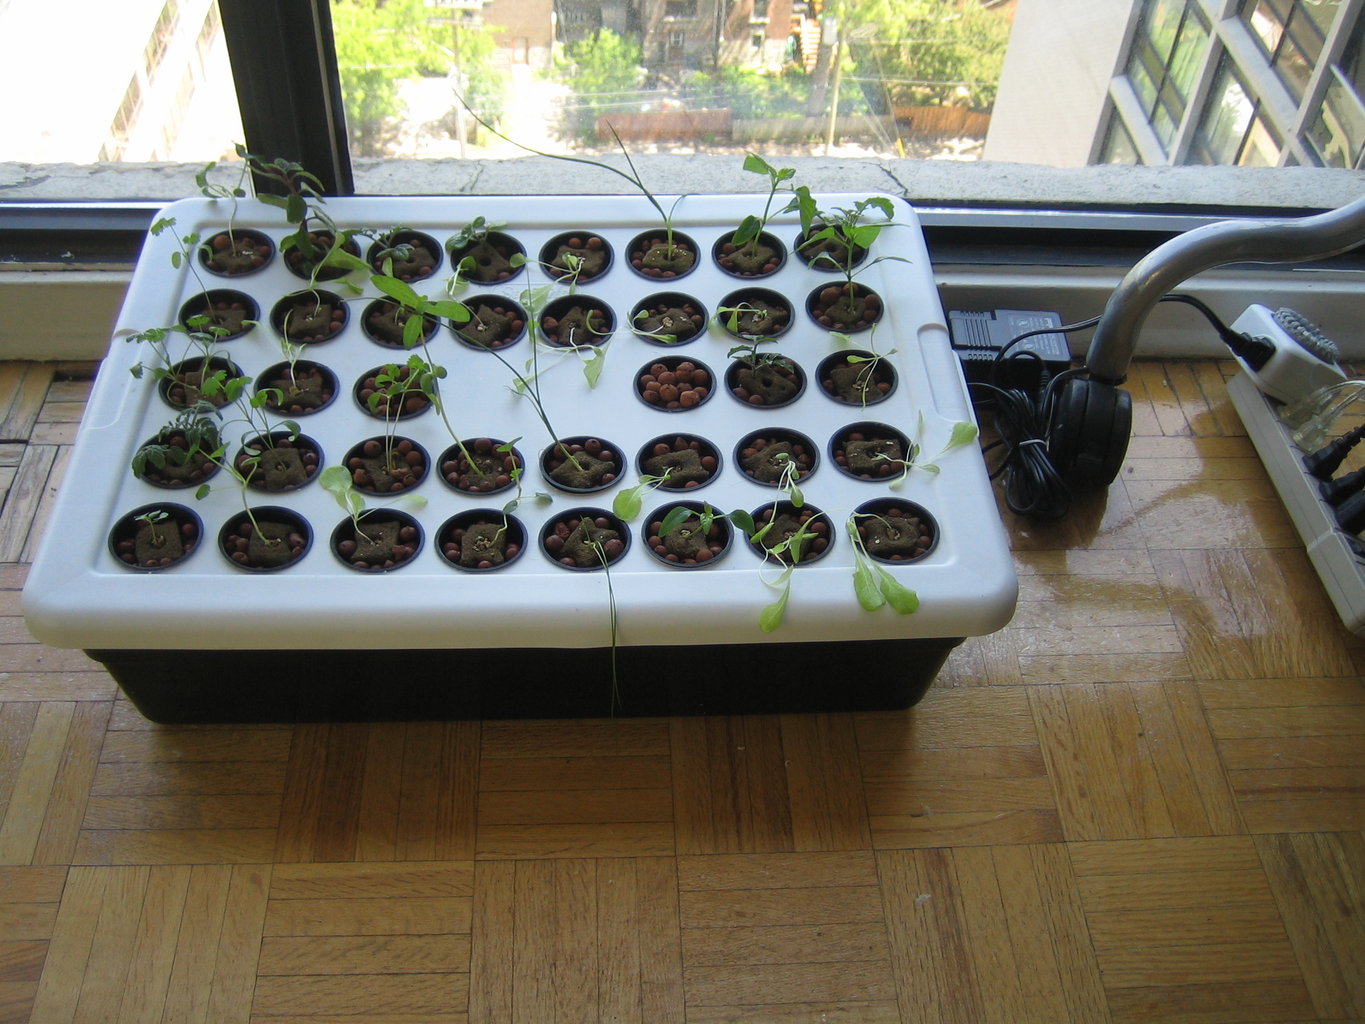
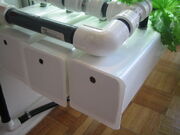
Propogator with fogger inside.
*Fogger/ultrasonic nebulizer. Try to stay away from the ones from China with tons of LEDs on them, they are low quality. You should expect to spend about $30-35 online (eBay or [[1]])with shipping.
- Wall timer, multi-setting. The best ones are the Intermatic ones with the built-in tabs, that you can set multiple settings.
- Black spray paint for plastic. This is to paint your container dark so as to keep light out.
Steps[]
- Spray paint your container and lid black with spray paint designed for plastic. Use several thin coats sprayed a few minutes apart. Let dry for a few hours and spray several more coats. Let this dry for a full 24 hours.
- Plot your site holes for the 2" net pots. You should be able to fit 38 sites. Leave the center of the lid empty, as this is where the nebulizer will sit inside the bin, and it tends to throw up lots of droplets of water, which would saturate any seedlings you place there.
- Drill your holes
- Clean stray plastic shavings from the bin and rinse everything off.

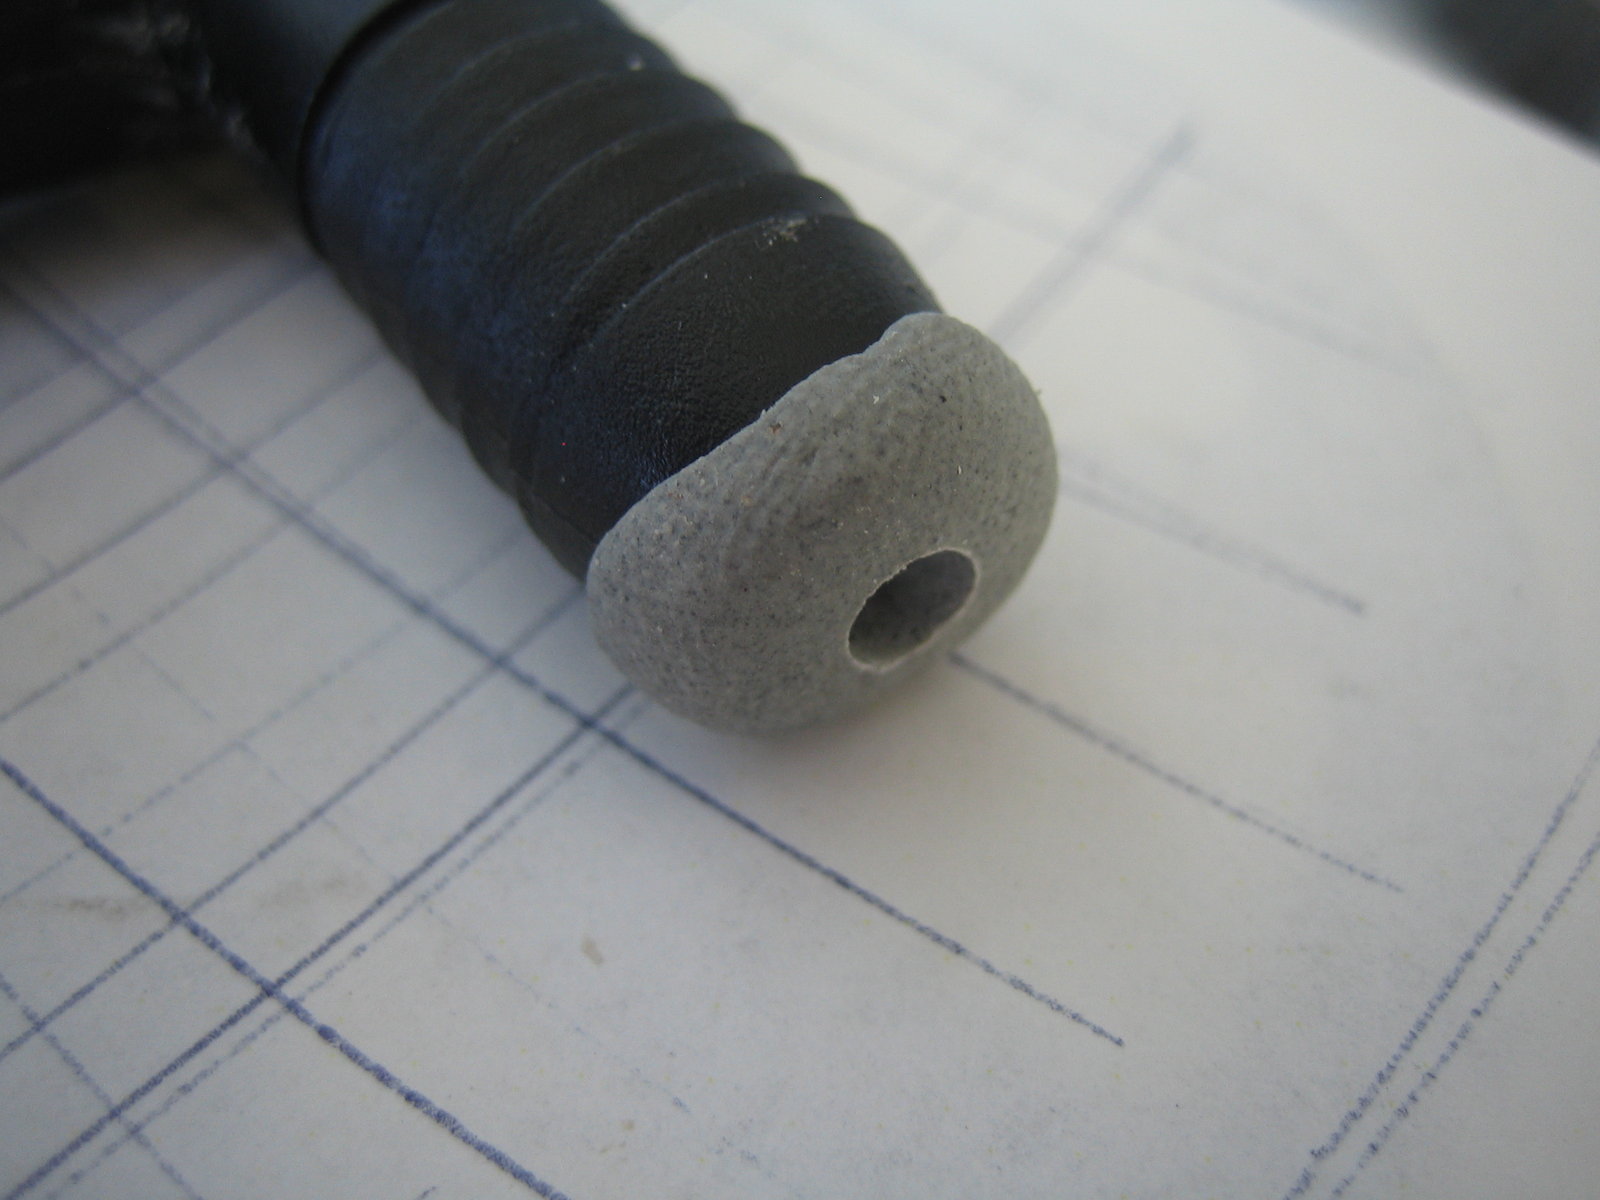
Roots inside propogator.
#Fill with about 12 liters of water, or until the water is 1.5" above the fogger transducer (the ceramic disk). I used an empty ketchup bottle filled with water to displace some of the nutrient to bring the level up when 12 liters was not enough. Most foggers have an automatic shutoff sensor that looks like a handle; do not measure the water height from the top of that.
- Mix your nutrient solution. I use 50% of the normal concentration, mixed with some root starter, and I lower the pH to 6.0-6.5.
- Place the fogger in the center of the bin, and run the cable over the edge, and snap the lid in place.
- Plug the fogger into its power adapter, then into the timer, and the timer into the wall.
- Set the timer to 1hour on, 30 mins off cycle
- NOTE The reason that you do not want to leave this running all of the time is twofold:
- The fogger unit heats up the solution
- Excessive moisture in your Oasis blocks will snuff out oxygenation of your new plants
- NOTE The reason that you do not want to leave this running all of the time is twofold:
- Insert your plants
- Place the garden in midlevel light, seedlings do not like full brightness!
NOTE Unlike in the photos, you should also paint the top black to minimize light exposure, which will tend to cause algae to grow in the roots.
Building Your Own Aero-drip[]
I have never built one of these systems before, so add to this wiki if you run into problems. Add flourescent lighting, nutrient mix, pH testing kit for about $50. An advantage of this setup is that you really do not need an air pump for aeration and you can use a small fluid pump just fine. I would estimate the cost of the system to be $70 if you already have a hole saw.
Supplies Needed[]
- Containment bin (a Rubbermaid tote)
- 4 feet 1/4" drip tubing
- 1/2" to 1/4" adapter
- 1GPH drip heads, one for each grow site
- Extra 1/4" tee to split the feed from the pump
- Fountain/statuary pump (anything over 90LPH should work)
Tools:
- Electric Drill
- Hole saw
Steps[]
Building Your Own Aero-flow (Cycling)[]
This is essentially the same system as above, but with a cycling timer instead of continuous drip. A torrential downpour every 5 minutes or so. This helps to keep the temperature of the nutrient low. Here, the irrigation is done through looped rings of 1/4" tubing, with 1/16" holes drilled all along the bottom side. A tee is used to close the ring, leaving an extra barb for the inlet.
I would estimate the cost of the system to be $140 if you already have a hole saw. The extra cost is attributed to the cycle timer.
Supplies Needed[]
- Containment bin (a Rubbermaid tote)
- 4 feet 1/4" drip tubing
- 1/2" to 1/4" adapter
- 1/4" barbed "Tee" (one for each grow site), for making your irrigation rings
- Cycle timer
- Fountain/statuary pump (anything over 90LPH should work)
Tools:
- Electric Drill
- Hole saw
- 1/16" drill bit, for drilling holes in your irrigation rings
Steps[]
Building Your Own Aeroponic System[]
I would estimate the cost of the system to be $160 if you already have a hole saw.Add flourescent lighting, nutrient mix, pH testing kit for about $50.
Supplies Needed[]
- Containment bin (a Rubbermaid tote)
- 2 feet 1/2" PVC irrigation pipe (or cut-to-size threaded risers work as well)
- 4 spray heads
- Fountain/statuary pump (a larger 200LPH+ is needed)
Tools:
- Drill
- Hole saw
- 5/16" drill bit, for drilling the holes in the 1/2" PVC for the spray heads
- 1/2" drill bit (Forstner is best) for drilling holes for PVC irrigation pipe
Notes:
I've found that a statuary/fountain pump only works for about 8 spray heads. The spray heads must also rated for high flow, because these sort of pumps are better at delivering volume than pressure. I am using eight 0.09" heads right now on a 396GPH pump, and am getting decent performance. I tried running 8 additional heads 18 inches higher and there was little more than a dribble from these. If you are planning a large system, you might consider a drip or NFT system, where thorough spray dissipation is not necessary.
Steps[]
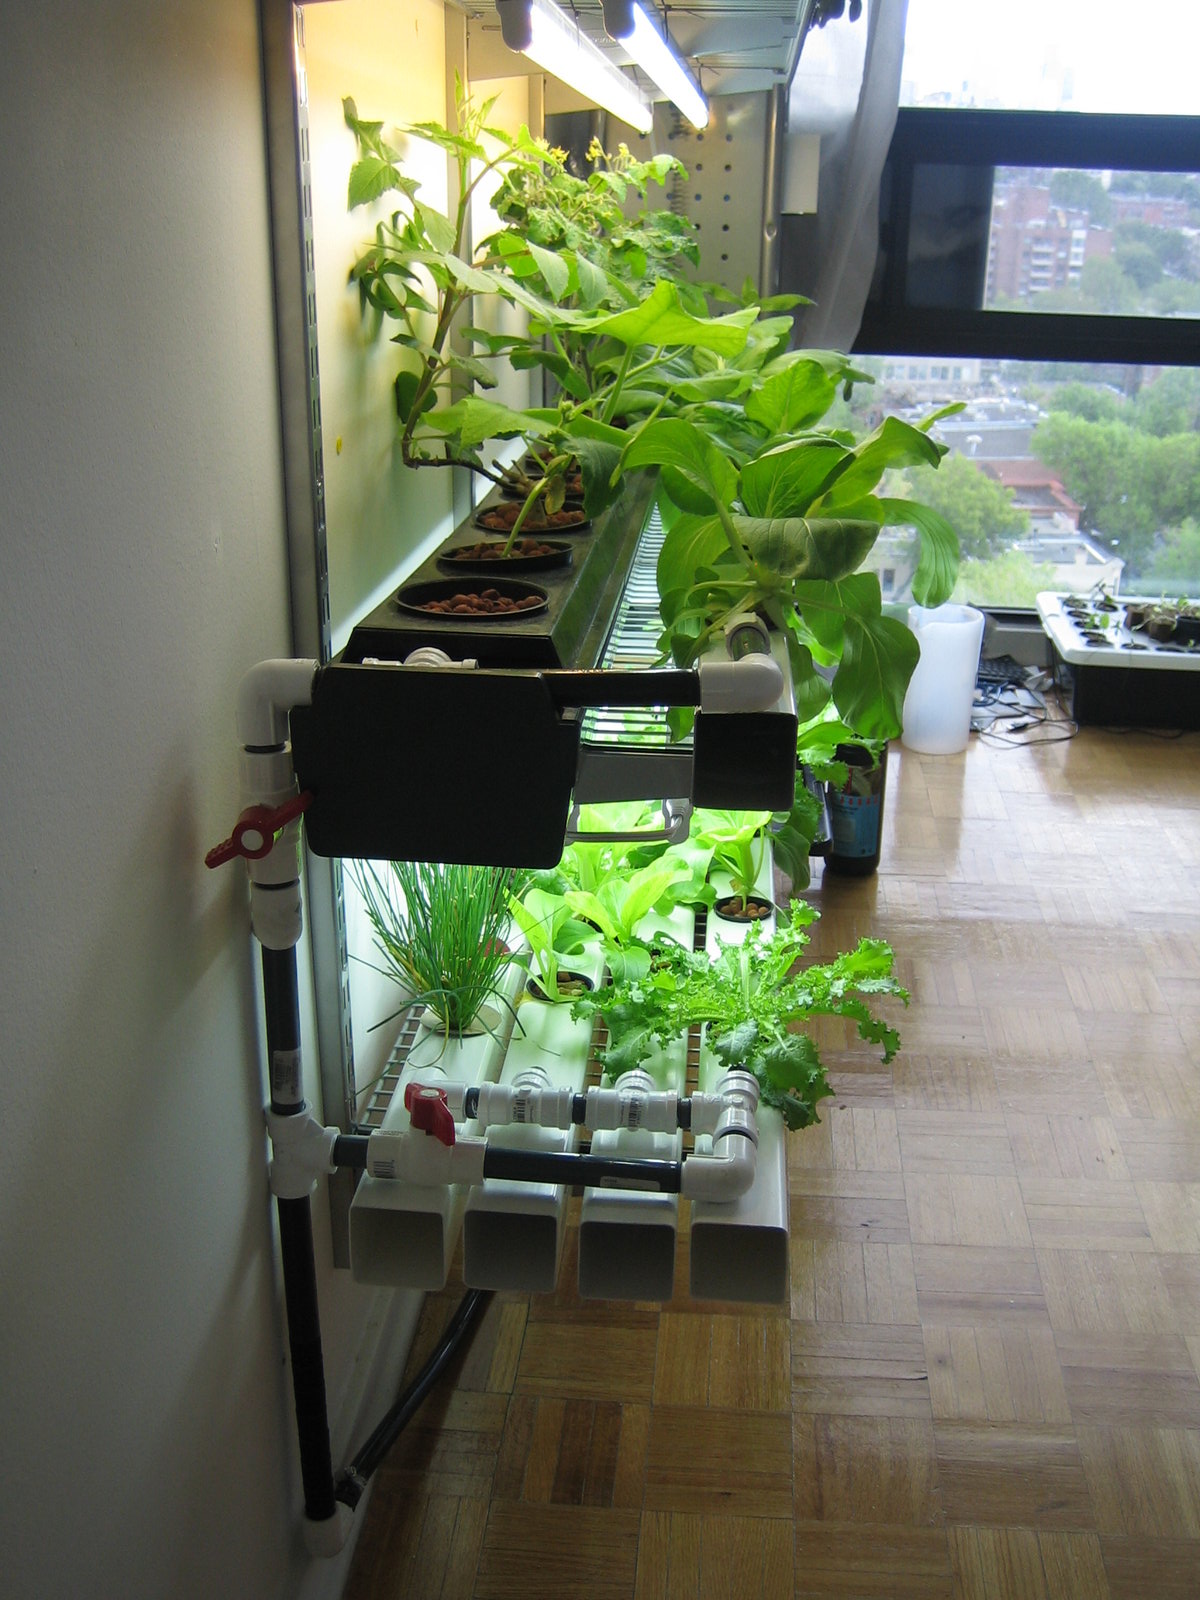
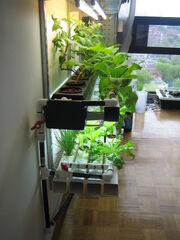
BBBuild Your Own Indoor Stratified NFT System[]
The NFT system is great for aeration, especially of you let nutrient free fall back into the reservoir. It is well-suited to quick growing crops such as salad, and can be suitable for tomatoes as well. It offers a lot of control, as you can vary the rate at which nutrient flows

Overview
through the channels. The recommended rate is between 1 and 2 quarts per minute.
If you are using round pipe, you need to secure them from rolling. You can do this in a couple of ways. You can sandwhich your pipes between wooden pieces, or you can drill large holes through the pipes perpendicularly at the top and pass a smaller diameter (say 1/2") pipe through those drilled holes. Additionally, you may be able to use this smaller pipe as the injection manifold. Personally I used square downspout lengths for salad, and custom manufactured black NFT channels with removable lids for larger plants.
NFT lends itself better to vertically integrated systems, as there is less weight that needs to be suspended, and a small pump can provide plenty of lift because there is essentially no backpressure from the system. You can place the channels on shelves mounted on a wall or building to have a compact, stratified hydroponics setup. This kind of arrangement, however, is better for low-growing crops such as salad, strawberries, etc.
This is a rather expensive setup. About $400.
Manifold view 1
Supplies Needed[]
- Piece(s) of square PVC drainage pipe or gutter downspout, 2.5" is suitable for small plants, 4" for larger plants
- Custom manufactured channels are available from many hydroponic stores
- PVC compact ball valve x2
- 1/2" threaded elbow to 1/2" tube adapters
- Fountain/statuary pump (a smaller pump is suitable)
- 4x 1/2" drain fittings
- Collection trough (simple plastic planter)
- Nutrient Reservoir (Dark)
- Dark 1/2" tubing, about 6-7 feet
- Adjustable shelf wall brackets x3
- Shelf supports x 12
- Shelves x4
- 4' flourescent SunBlaster fixtures 3x6500k, 1x2700k
Tools:
- Drill
- Hole saw (2" or 3.5" depending on the basket size you wish to use)
- 5/8" drill bit (Forstner is best) for drilling holes for injection points at the head of the channels
Steps[]

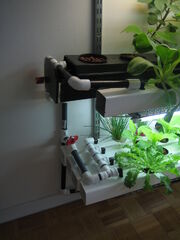
Maifold view 2
[]

Capped off ends with view holes
- Mount your supports on the vertical surface. Those adjustable shelf rails with slots for metal supports work really well. Mount the rails and place the supports at a declining angle, and rest your NFT channels straight onto that!
- Cut your gutter/pipe to the length you wish, 5' is perfect in my case.
- Leaving about 8" on one side and 12" on the other, drill the 2" pot holes using a hole saw (7-8 pot holes in my case)
- The extra 12" on one side leaves space for the injection manifold to rest on, so you don't have to mount the piping to the wall.
- Build your manifolds. The manifolds double back on themselves as shown in the pictures in order to create extra room for the ball valves. I have four channels on the lower level, so my manifold has four(4) 1/2" slip-joint elbows. The ball valves allow you to proportion flow, otherwise the pump will only pump to the first level.
- I found out later that the 1/2" elbows did not provide enough backpressure against the pump, so each elbow was ejecting different quantities of nutrient. To resolve this I bought some all-purpose bonding putty in the plumbing section of the hardware store and molded small slugs of it to the ends of the elbows, then used a 5/32" drill to tap the putty after it had hardened. Now all of the injectors have the same flow rate regardless of levelness, etc.
- Drill the 5/8" holes at the injection sites. Drill them far enough down the channels that the manifold can still rest on the protruding 12".
- Drill your plant site holes. In my case, I placed 7 sites on a 5' section about 8" on center between pots. Use your best judgement
- Rinse any shavings left over from drilling.
- Cut a piece of black flexible tubing to run from the pump to the start of the injection system
- Place your nutrient reservoir at the exit end of the system.
- If you wish to use drains on the end of your NFT channels instead of just letting them dump into the collection trough, seal off the ends with a piece of flat plastic and silicon. Be sure to drill the holes and mount your drain fittings before sealing up the ends! You'll need to seal the ends on the upper level to direct the flow nicely to the recovery trough. Do not try to use pieces of string to guide the water. I tried this and the twine just gathered and bred mold and algae. Instead, use the drain fittings with dark tubing.
- Buy a trough from a Dollar Store. Pick one that is smaller than the width of your reservoir so that it fits inside about an inch.
- Drill a hold in the bottom of the recovery trough and install a drain fitting. You could skip this step and just drill holes.
- Mount the trough at the end of the channels and make sure that it collects all of the ejected nutrient and funnels it back into the reservoir.
- Fill your reservoir with nutrient, turn on the pump, and adjust your valves to the correct flow of 1-2liters/quarts per minute to each channel.
Additional Notes:
- On the lower level, the downward side of the channels are left open. I put an empty water bottle in the collection trough to quiet the streams of nutrient.
- In this system, the upper level is reserved for larger, more mature plants, and the bottom is for smaller, low-lying crops.

Restrict the flow for a little backpressure using hardening putty
*I am using a concentration of 800ppm or so, to balance between the tomatoes, cucumbers, and salad in this system.
- The collection trough I bought at a dollar store. It is just a small rectangular planter that happens to fit well in the reservoir.
- To minimize evaporative losses, I capped off the channels at the injection end with pieces of plastic from milk jugs and drilled a small hole in the end caps in order to view the flow rates.
Maintaining the System[]
Move your plants to the upper channels as soon as the plant reaches 5" tall. Once plants become larger than they they will be almost impossible to move because the roots will have really developed.
Nutrient solution evaporates 1L every day, and I find that the pH rises as the nutrient is used. So Every 2nd day I make 2L of a 50% nutrient mix, and about 8 drops of 20% phosphoric acid to bring the pH to around 5.0. I then add this to the main reservoir and stir.
Suitable Crops[]
- Lettuces
- Bok choy (Pak choy) (8"-10")
- Dwarf tomatoes (Tiny Tim - 12"-18")
- Peppers (12"-18")
- Broccoli (12"-18")
- Crawling, lightweight vines (flowers)
Build an Outdoor Dutch Bucket (Bato Bucket) System[]
Here's a great article on how to do this on the cheap. The downside of this system (and the solar system below) is that it stores a fair amount of nutrient solution in a place where it can be heated by the sun. You may be better served by an NFT system where most nutrient stays in the reservoir, which can be buried or shielded from the sun.
Build a Solar Powered Outdoor Dutch (Bato) Bucket System[]
Here is a design that I've come up with that I hope to build soon for the roof of my building. It uses a 1.5W solar panel and a 6v pump to lift water 20" to a reservoir bucket. Cost target is under $60 for the solar pump system, buckets for free (from restaurants & coffee shops), some fittings, pipe, and media (4 bags of rough bark) for $30. Total cost should be in the $90 range.
I am still in the process of picking a design for the float switch that will turn off the 6v pump when the nutrient level is too low, otherwise the pump runs dry and will burn out! Here are the plans so far. They are based on dipstick tube with a float inside attached to a dipstick lined with magnets at a certain level. A magnetic reed switch cuts off the power to the pump when magnets get too close. The goal is to make the system self sustaining for at least 7 days at a time. In my climate, where humidity is high, this may be possible because the evaporative loss will be reduced. Don't think that you'd be able to do that in the desert!
TOD[]
- Spend more on a bigger solar panel and pump to get more lift
- Integrate automatic top-off system using external water reservoir
Build an Outdoor NFT System[]
There is only a small area exposed to rainwater, so the risk of overflow is lower than with a dutch bucket system. There is less fluid in the system to be heated by sunlight
Supplies Needed[]
- NFT channels, either custom manufactured or 4" PVC pipe, or gutter downspout
- Custom manufactured and PVC pipe are nice because you can easily seal the ends with manufacture parts, whereas with downspout you'll probably be getting the silicon out.
- Dark nutrient reservoir (12-20liters)
- Black 1/2" tubing
- LECA stones for the baskets
- Mesh baskets
- Fountain pump (smallest you can find)
- Electronic float switch rated for 120VAC, to protect the pump from running dry
TODO[]
- Integrate automatic top-off system using external water reservoir
Build an Outdoor Solar NFT System[]
This system is almost like the non-solar version, except that a course medium is used in the channels as a buffer for overnight when the solar pump is not running.
Supplies Needed[]
- NFT channels, either custom manufactured or 4" PVC pipe, or gutter downspout


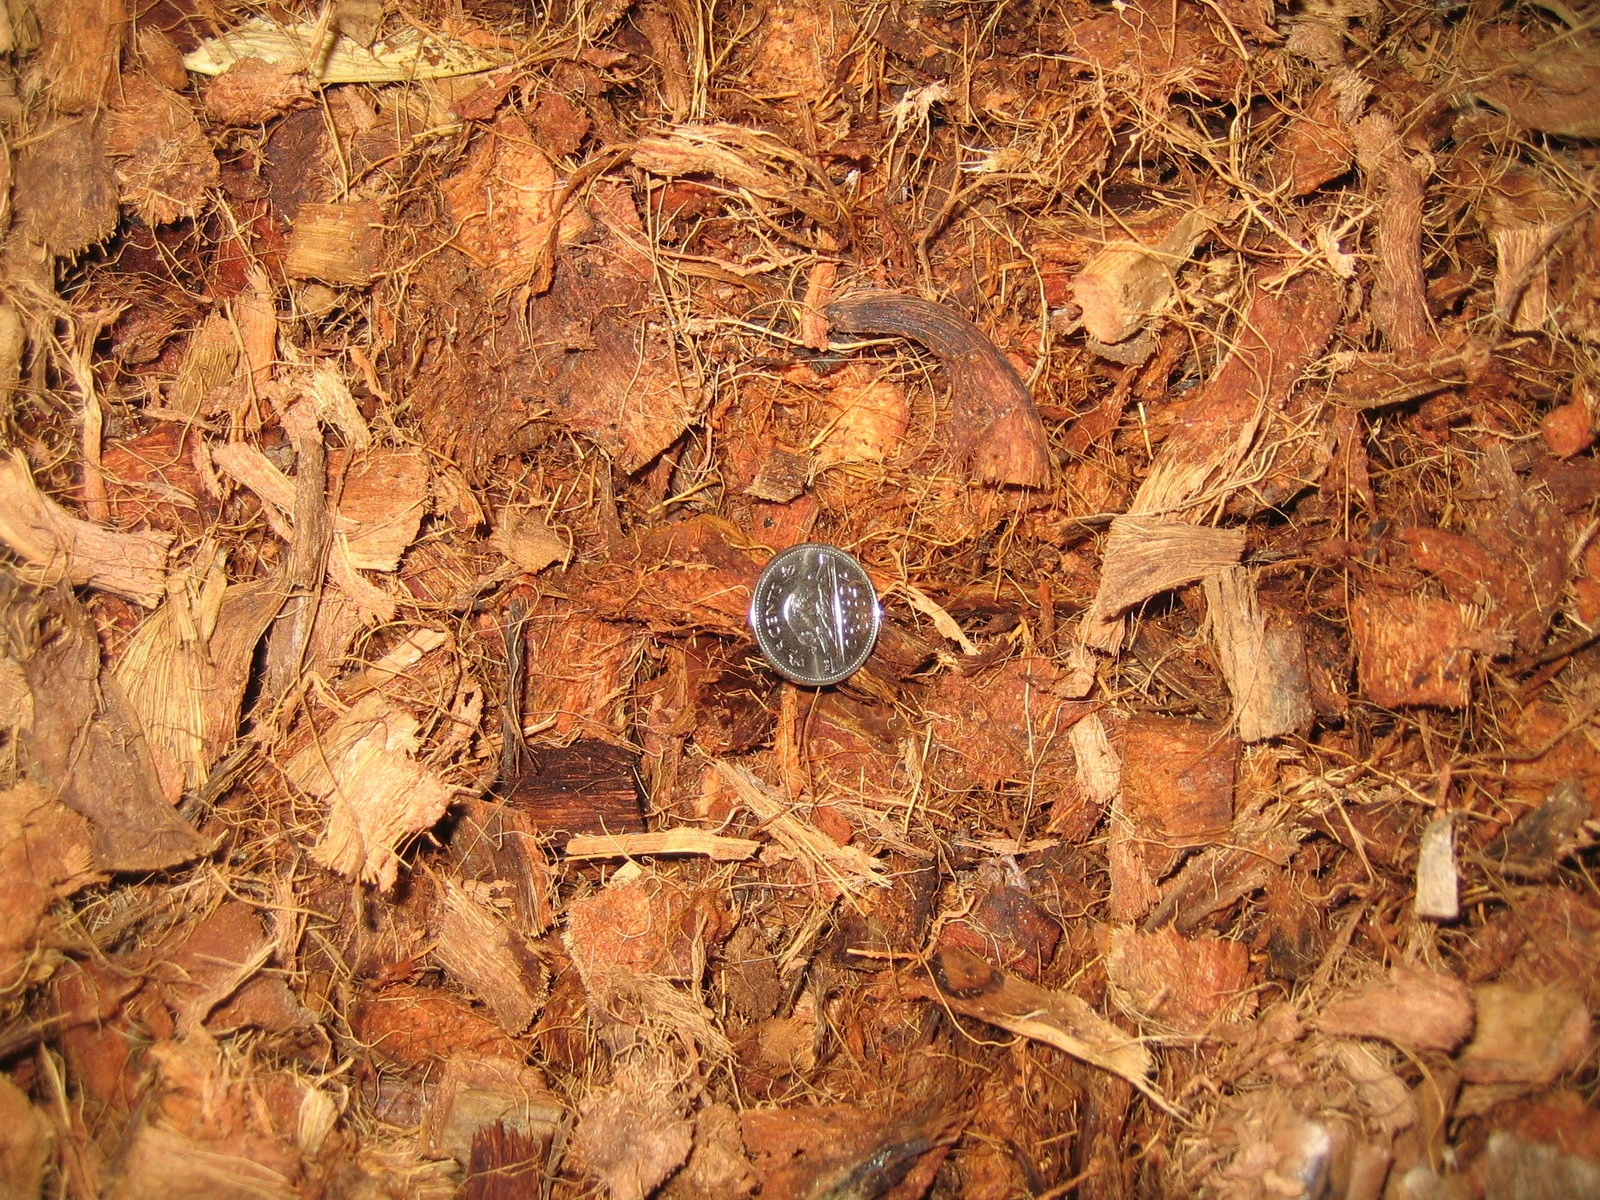
Coco chunk medium, with nickel for scale
- Custom manufactured and PVC pipe are nice because you can easily seal the ends with manufactured parts, whereas with downspout you'll probably be getting the silicon out and cutting sheets of plastic to glue to the ends.
- If you are going to use 4" PVC, buy the end caps it makes things easier
- Dark nutrient reservoir (12-20liters)
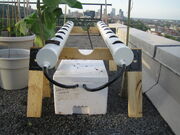
- Local seafood stores may have large (44L) styrofoam containers with covers that are used to ship large fish. The advantage being that they are insulated from light and heat, and you are helping the environment by reusing them. They are also shallow and long, which will minimize the amount of tubing needed.
- Black 3/8" tubing for drip
- Runs from pump to start of NFT channels
- 3/8" tee
- Two 3/8" elbows
- Course growing medium, good aeration, and large enough pieces to not be carried away by nutrient flow
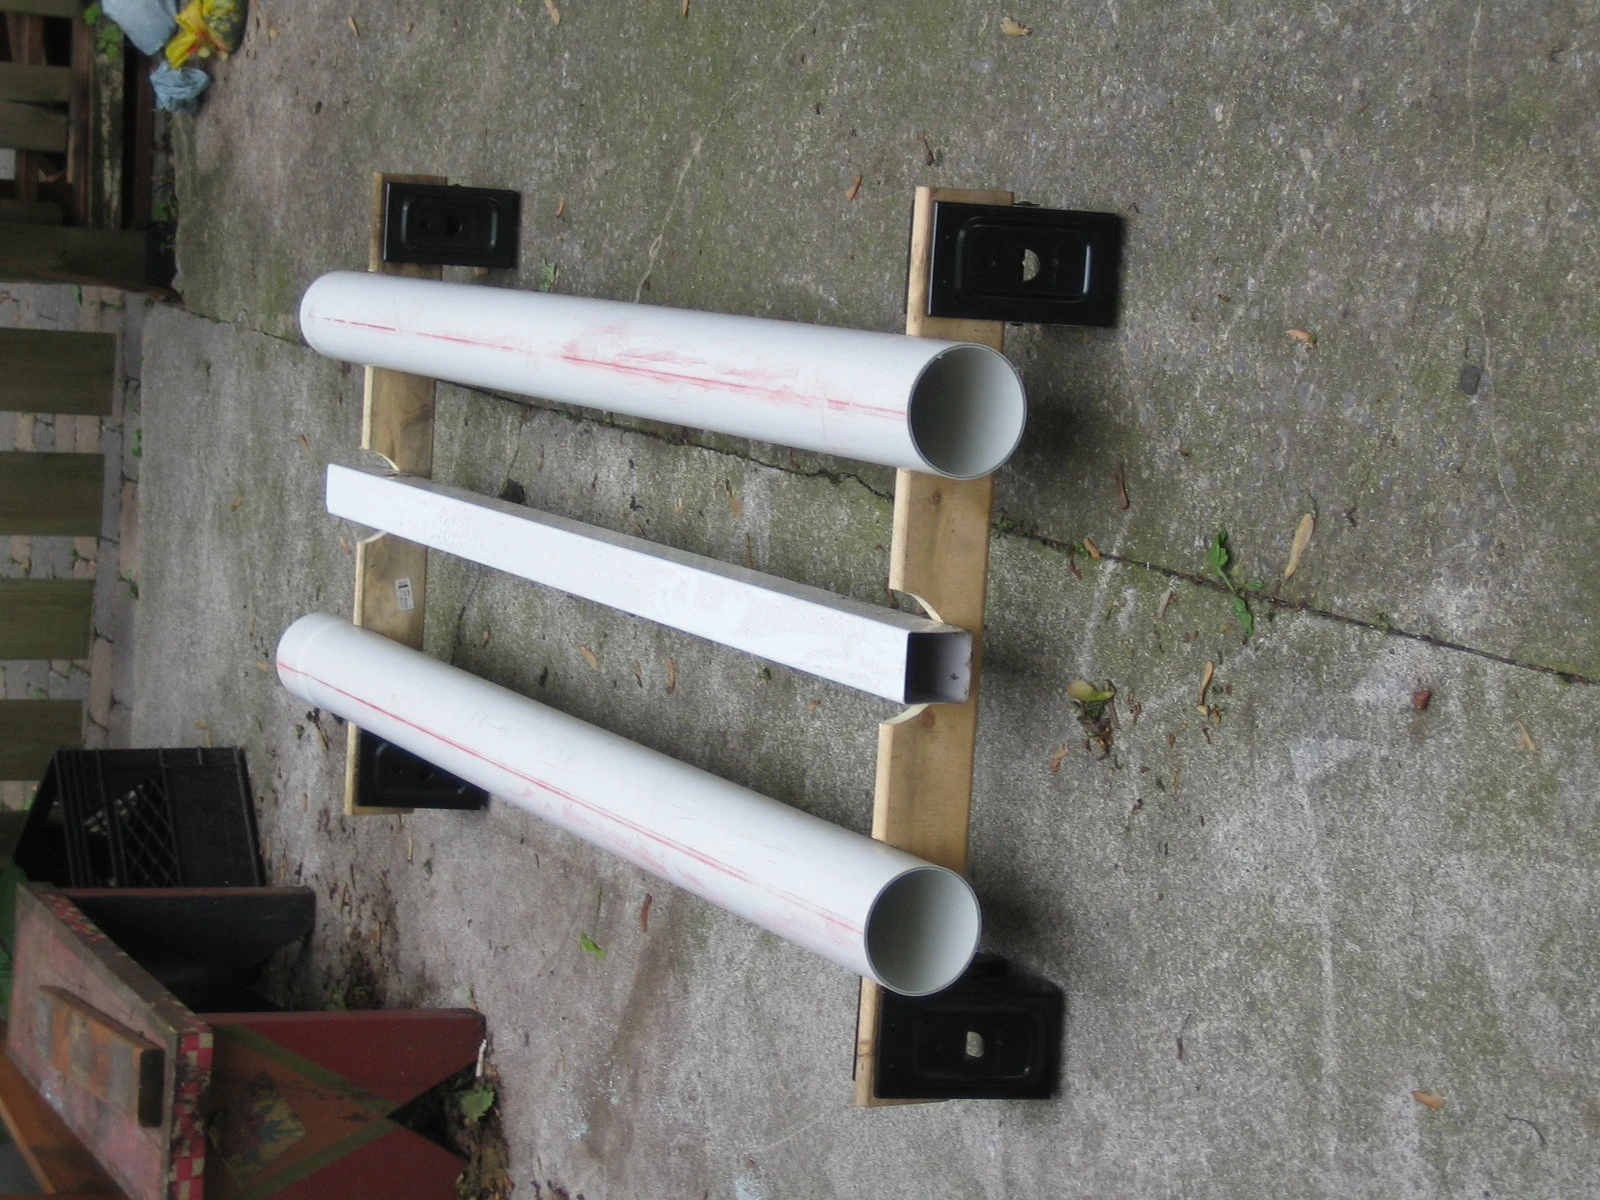
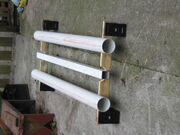
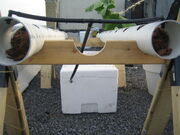
Pipes, wood braces and sawhorse kit
*
- Coco chunks, LECA are good options. I used a 80%/20% coco chunk/LECA mix
- If you packed the system full enough, perlite could work I suppose
- Mesh baskets, although really you can plant directly into the channels, but baskets will let you establish plants outside of the system first, then just put in the pots, and they provide stability for larger plants
- Solar panel and pump, available on eBay from $35-$50, Home Depot for $50-$60, try and choose a model with at least 18" of lift, and rated for salt-water use.
- 6gallon bucket (18L) for storing top off solution
- Two 1/2" drain fittings
- Float valve for controlling top off solution
- Tubing that fits your float valve
- Grommet to seal the spot on the bottom of the top off bucket where the tubing will go in
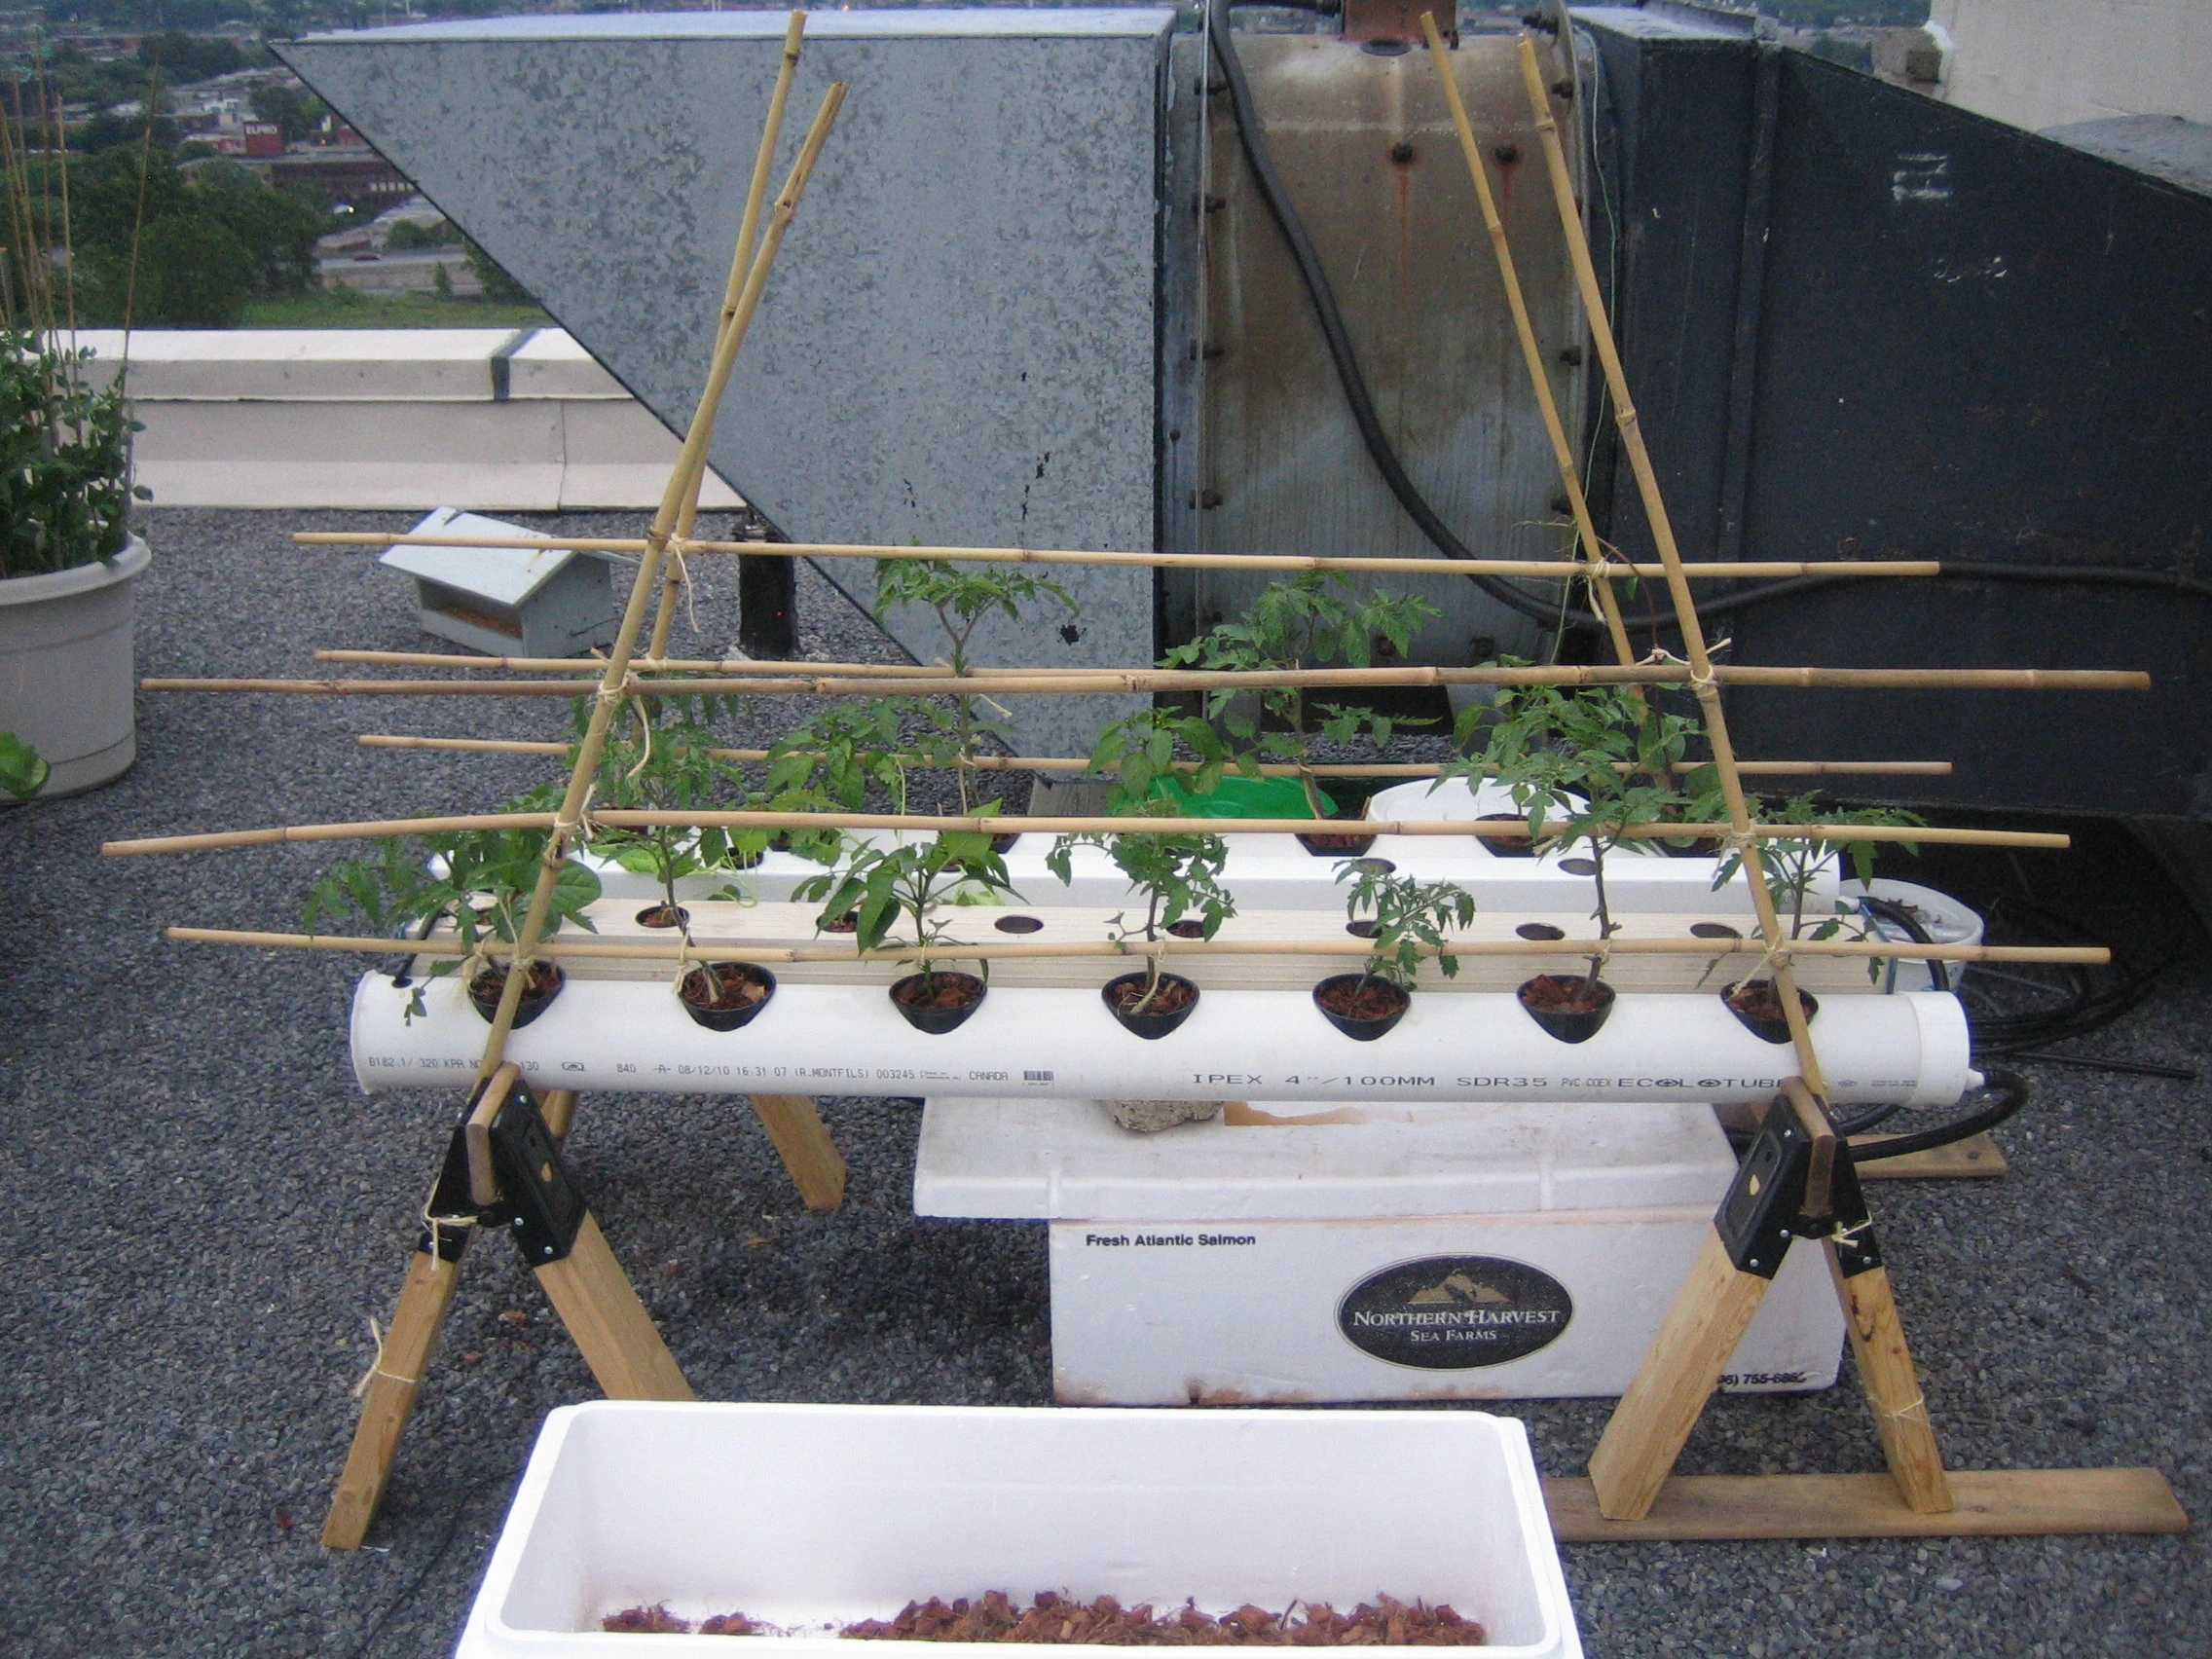
- 4 bamboo stakes 72" long

Downstream side
*Twine for trellising
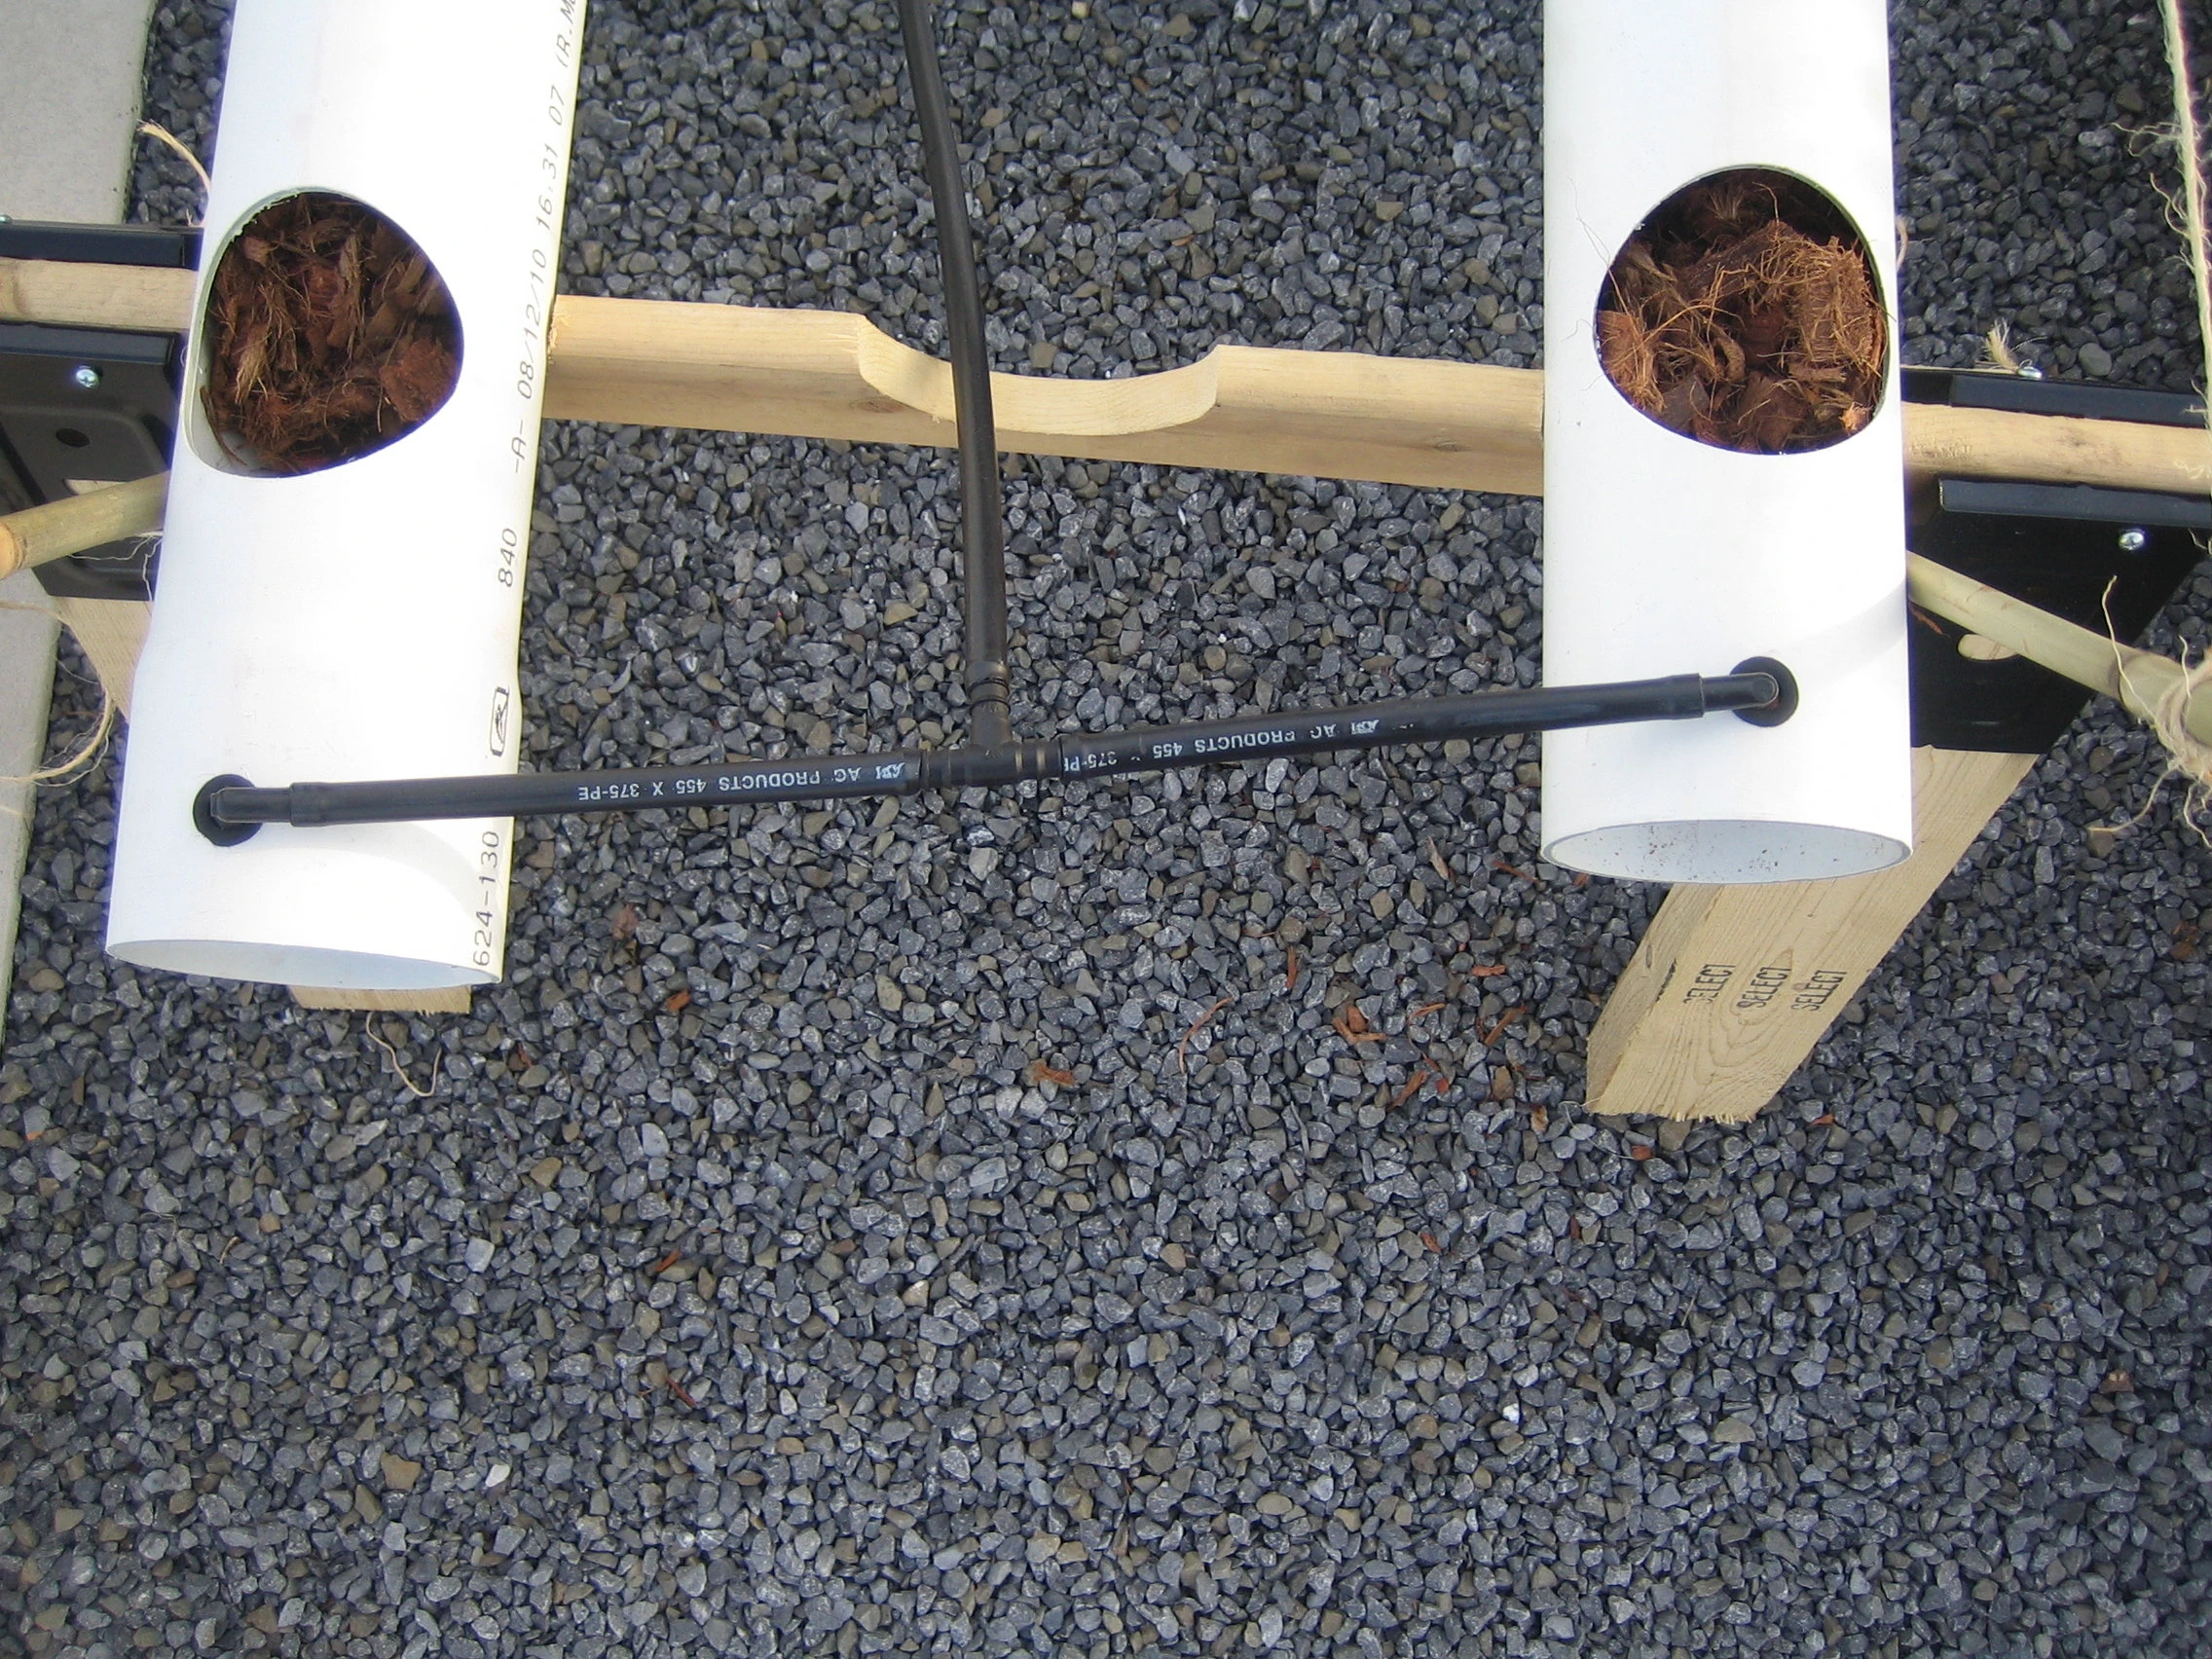
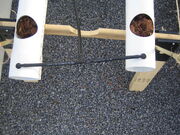
Injection "manifold"

Upstream side
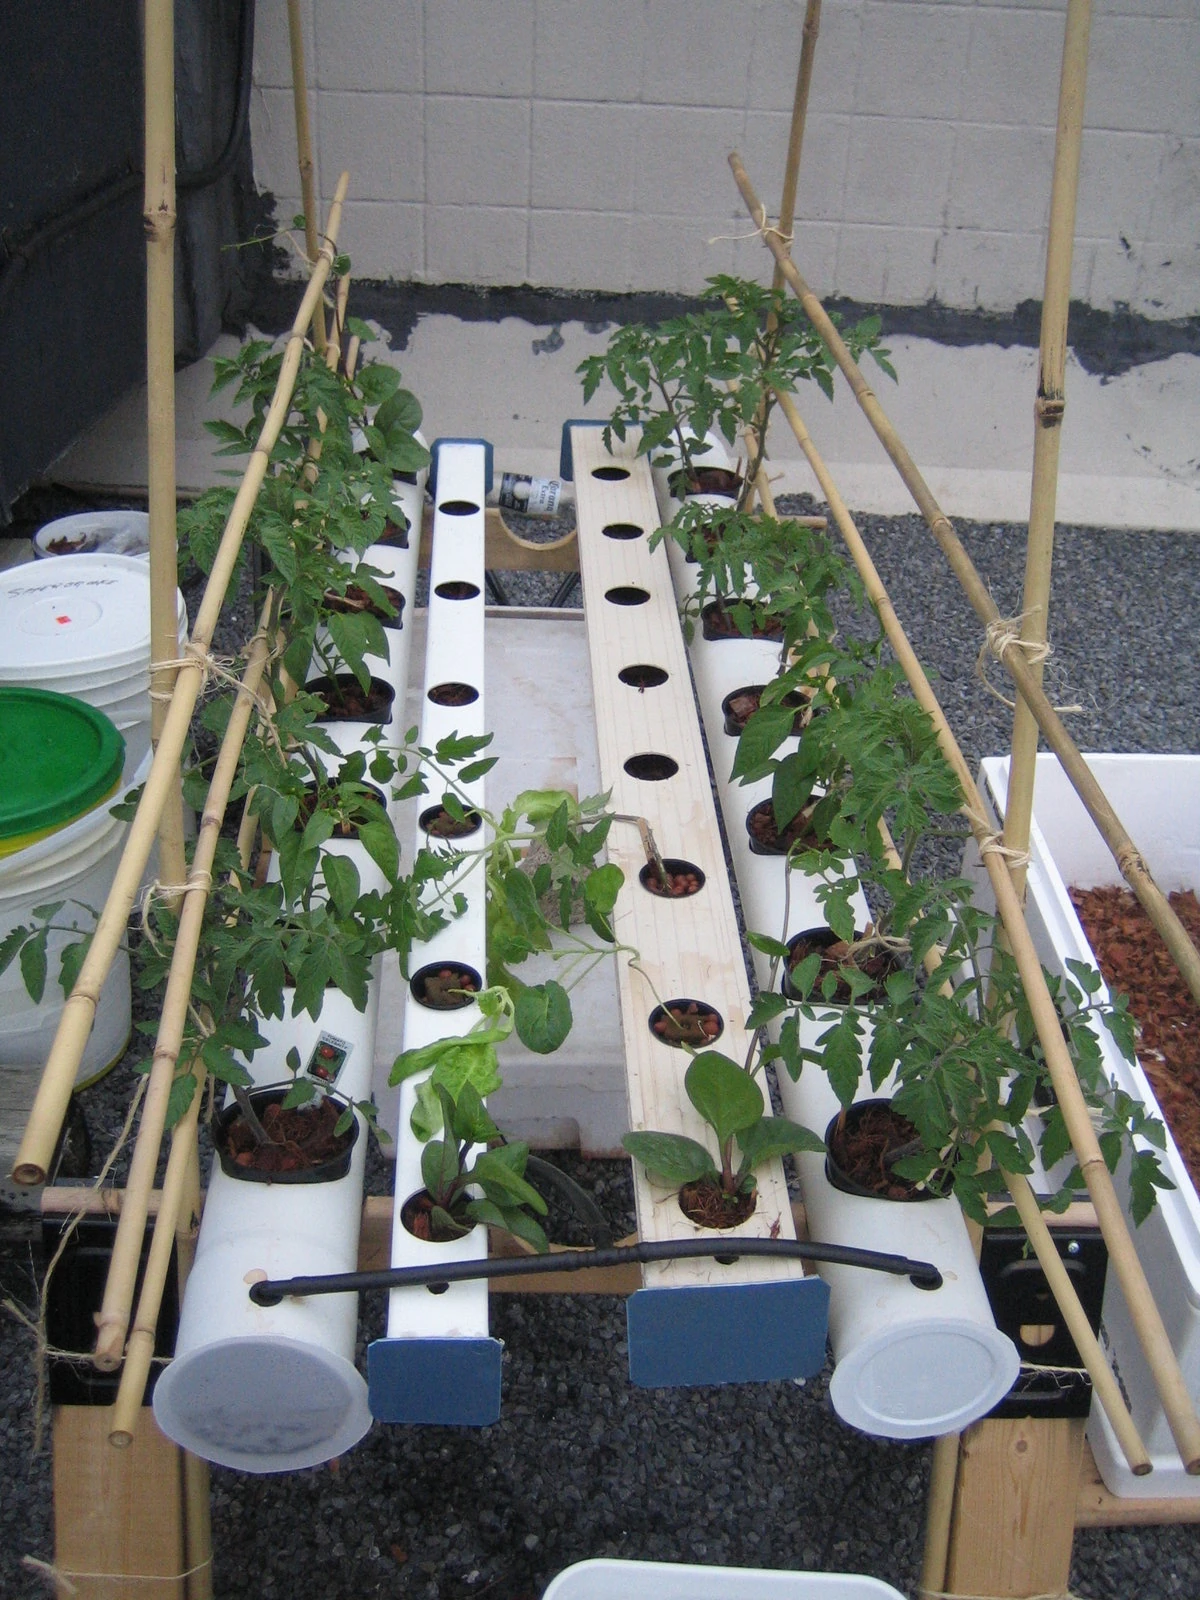
With plants
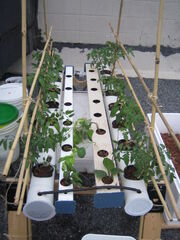
Another overview
TODO[]
- Integrate automatic top-off system using external water reservoir
- In progress--I've gathered an 18L bucket, that should provide several days (4-5) of top-off liquid. I'm planning on filling the bucket with 50% strength nutrient and pH balanced to 6.0, and a float valve I found at a hydroponics store for $10. I was estimating plants to "sweat out" 4L per day.
- Come up with a better/more stable trellising system.
Steps[]
- If you are using 4" PVC pipe, cut into 5' lengths and drill your pot holes using a hole saw. I am using 3.5" net pots for stability, so I had to use a drill press to drill these large holes. To line up your holes, secure the pipe to keep it from rolling and use a chalk line to snap a visible line down the center of the pipe. Your first hole can be 4" from the start of the pipe, as the roots will mostly grow downward to the end, so make your last hole 8" from the end to try and prevent roots from clogging the drain. I used a spacing of 8" on center, as I felt that with a daily nutrient bath, the plants would not be competing. Think about the space required for the canopy.
- Drill holes in the downside endcaps as close to the bottom edge as you can for the 1/2" drain fittings. Install them.
- Drill your holes in the 4" of space at the header end of the pipes. Make your hole large enough to snugly fit a rubber grommet.
- Rinse the pipe sections of plastic shavings and cap off the end with caps and pipe glue
- Build two sawhorses for holding the channels above the reservoir at a slant. Use a jigsaw to cut half-circles in the crossmembers to keep the pipes from rolling around.
- Run 1/2" black tubing from the drain fittings to the reservoir. Drill holes in the reservoir to pass the tubing through. If you are using the styrofoam reservoir, drill on a downward angle to prevent nutrient from backflowing back along the outside of the tube and out of your reservoir.
- Build your injection manifold by cutting 3/8" tubing and installing a tee, then run 2 more pieces of your 3/8" tubing to the injection holes, and install the 3/8" elbows. Insert the elbows through the rubber grommets you installed on the upper end of the tubes.
- Install some mesh netting/screen over the drain inlet inside the tube, to keep debris out. In my 4" PVC system, I just folded and cut screen door mesh to fit the inside of the endcap and over the drain.Use a rough mesh, we will install another net bag around the pump to safeguard against debris getting in the pump
- Attach the pump to the injection manifold with a piece of 4' or so black 3/8" tubing
- Attach the solar panel and test the pump and drainage systems
- Fill the PVC channels with coco chunks. Rinse the coco well to remove sawdust flakes. Soak the medium. Try to run enough water through the system until the water runs clear.
- Now onto the trellising. I had a lot of difficulty with this because I wanted to have upright stakes with string running horizontally every 8 inches or so, but trying to get the strings taut tries to tip the sawhorses! I am thinking about better ways of doing this.
- Fasten your bamboo stakes to the sawhorse legs at an outward angle.
- Tie horizontal lengths of string from the upper end stakes to the lower end stakes.